TeXLive2024がインストールできない。

TeX Live 2024がリリースされていたので、インストールしてみました。

BitTorrentでISOをダウンロードして、ISOイメージをダブルクリックすると自動でマウントされるので、そのままinstall-tl-windows.batを実行。するとエラーになります。


こんな感じ。もしかしたらPythonのtcl/tkとかち合ってるのかもしれません。

ぐぐってみるとError in Installation Processにあるのが同じ状態でした。

結論として、コマンドプロンプトを開いて

i:\install-tl-windows.bat -texdir c:\texlive\2024 -gui text

とすれば、GUIなしでインストーラを起動でき、無事にインストールできました。

QNAPで/etc以下のファイルを置き換える。

うちのQNAP NASはちょっと古いTS-669Lです。

[    0.017724] CPU0: Intel(R) Atom(TM) CPU D2701   @ 2.13GHz stepping 01

dmesgではx86アーキテクチャのAtom D2701を使っていることがわかります。
アプリケーションのアップデートに合わせて、時たまQTSのアップデートもありますが、

[  522.957235] ====== 2024-05-04 09:16:06 TS-669L (4.3.4.2675-20240131) boot finished.

バージョンは4.3.4。2017年にリリースされたものです。最新バージョンはQTS 5.2です。なのですでにサポート対象外です。一応、最新の筐体をディスクレスで持ってきて、HDDを順番通りに載せ替えれば使えるらしいですが、でもちゃんと使えてますので。16TBx6ですけど、使えてますので。

ところでこのQNAP、App Centerで提供されているアプリ以外にも、Linuxで利用できる色々なソフトウェアが利用できるようになっています。メールサーバやWikiサーバにすることもできます。そのためには、Entware-stdをインストールして、QPKGを使えるようにする必要があります。

Entware-stdは、以前にあったEntware-ng-3xとEntware-ngが1本化されたものです。インストール方法は、こちらにあります。このページにあるリンクからqpkgをダウンロードして、App Centerの右上にある田の字っぽいアイコンから手動インストールを行います。

次に、ユーザのホームディレクトリ($HOME)に、.profileを作成します。Entware-stdは/opt/etcにprofileファイルを作成し、opkgでインストールされるディレクトリへのパスなどを設定するようになっています。なので、Entwareをインストールしたら、$HOMEに以下の内容を記述した.profileを作成して、/opt/etc/profileをソースします。

source /opt/etc/profile

Entware-stdはGUIアプリではないので、いろいろとインストールするにはsshログインする必要があります。が、sshログインするためのいろいろは割愛で。

Entwareはopkgコマンドで管理します。sshログインしてopkgとタイプすると、ずらーっとコマンドオプションが表示されます。リポジトリのパッケージリストを取得するには、
opkg update

します。ちなみにパッケージリストはここにあるものと同じ内容みたいです。が、ここでroot(あるいはadmin)権限がないと、パッケージリストのxmlファイルを保存できずにエラーになります。もちろんadminアカウントでログインすればいいんですが、個人的セキュリティポリシーとしては通常ユーザでログインして、suなりsudoなりしたいです。使い勝手ならsudoがベスト。でも、sudoするにはsudoersにユーザの記述をしないといけません。標準で入っているsudoは、/usr/etcからsudoersを読み込んでいます。ところがこのディレクトリは、リブートのたびにリフレッシュされます。つまり、起動後にこのsudoersを編集しても、リブートするともとに戻ってしまいます。

リフレッシュするにはオリジナルが必要ですが、そのオリジナルは /mnt/HDA_ROOT/.config にあります。が、そこにはsudoersがありません。どこにあるのか調べようと思っても、ディレクトリツリーもいろいろあっちゃこっちゃしていて、探すのめんどくさい。こんなときこそlocate!……入ってません。しかたないからfindで……Permission denied。

じゃあどこかにファイルを作っておいて、起動時に自動で上書きコピーするしかないか、ということでぐぐってみると、Running Your Own Application at Startupなるページを見つけました。起動時にautorun.shを実行してくれるようです。

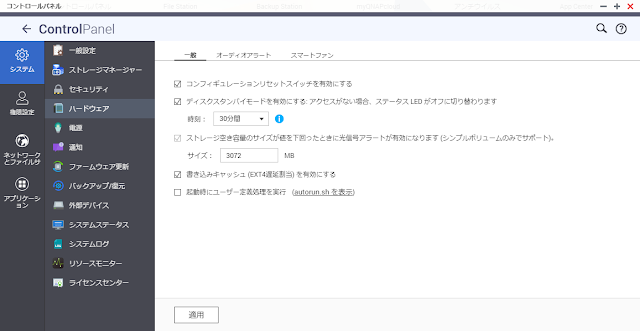
autorun.shを使用するには、QNAPのコントロールパネルから、「システム」➔「ハードウェア」➔一般タブの「起動時にユーザー定義処理を実行」にチェックを入れて、autorun.shを実行してくれるように設定します。


起動時のどのタイミングで実行されるのかがわからないので、そのあたりは試してみるしかなさそうです。が、ここにあらかじめ用意しておいたファイルをコピーするような指示を入れれば、うまくいきそうです。もっとも、パーミッションとかセキュリティ的に考えることがありそうなので、/mnt/HDA_ROOT/.autorunなどのフォルダを作ってsudoersなどを置き、それをコピーするようにすればよさそう。

なのですが、もうちょっとクレバーなやり方はないかな、と探してみたら、create-autorunというのを見つけました。これは、上記の方法で作成されたautorun.shをお仕着せで作成してくれるツールです。このツールを使うと、

/share/CACHEDEV1_DATA/.system/autorun/autorun.sh

を自動で作成してくれます。さらに、

/share/CACHEDEV1_DATA/.system/autorun/scripts/

以下に、rc.dスクリプトのように数字付きでスクリプトを置くことで、順番に実行してくれるようです。

このツールはインストールする必要はなく、adminアカウントで

curl -skL https://git.io/create-autorun | sudo bash

などとすればよさそう。

実行すると以下のようにメッセージが出力されます。幅が足りなくて改行が変ですが。

[/mnt/HDA_ROOT] # curl -skL https://git.io/create-autorun | sudo bash
create-autorun.sh 230527
info: NAS model: TS-669L
info: QTS version: 4.3.4 #20240131
info: default volume: /share/CACHEDEV1_DATA
info: autorun partition should be: /dev/sdg6
done: mounted: ext2 device: /dev/sdg6 -> /tmp/create-autorun.fh0ERU
info: confirmed partition tag-file exists: uLinux.conf (we're in the right place)
done: created autorun script processor: /share/CACHEDEV1_DATA/.system/autorun/autorun.sh
done: created script store: /share/CACHEDEV1_DATA/.system/autorun/scripts
done: created symlink from partition to autorun.sh
skip: autorun.sh is already enabled in OS
done: unmounted ext2 autorun partition
info: please place your startup scripts into: /share/CACHEDEV1_DATA/.system/autorun/scripts
info: your autorun.sh file is located at: /share/CACHEDEV1_DATA/.system/autorun/autorun.sh 

インストールしたら、/share/CACHEDEV1_DATA/.system/autorun/scriptsに必要なスクリプトを記述すればいいので、まずsudoersをコピーしてきます。
mkdir etc
/share/CACHEDEV1_DATA/.system/autorun/etc
cp /usr/etc/sudoers .

そしてsudoersを修正したあと、00_sudoersとでもしてscripts以下にファイルを作成します。

#!/usr/bin/env bash
ETC_DIR=/share/CACHEDEV1_DATA/.system/autorun/etc
cp -v ${ETC_DIR}/sudoers /usr/etc

これでsudoが使えるようになりました。

さっそくzshをインストール。

[kats@QNAP ~]$ opkg list zsh
zsh - 5.9-2 - Zsh is a UNIX command interpreter (shell) usable as an interactive
 login shell and as a shell script command processor. Of the standard
 shells, zsh most closely resembles ksh but includes many enhancements.
 Zsh has command line editing, builtin spelling correction, programmable
 command completion, shell functions (with autoloading), a history
 mechanism, and a host of other features.
[kats@QNAP ~]$ sudo opkg install zsh
Installing zsh (5.9-2) to root...
Downloading http://bin.entware.net/x64-k3.2/zsh_5.9-2_x64-3.2.ipk
Installing libcap (2.69-1) to root...
Downloading http://bin.entware.net/x64-k3.2/libcap_2.69-1_x64-3.2.ipk
Installing libncursesw (6.4-2a) to root...
Downloading http://bin.entware.net/x64-k3.2/libncursesw_6.4-2a_x64-3.2.ipk
Installing libncurses (6.4-2a) to root...
Downloading http://bin.entware.net/x64-k3.2/libncurses_6.4-2a_x64-3.2.ipk
Configuring libcap.
Configuring libncursesw.
Configuring libncurses.
Configuring zsh.
[kats@QNAP ~]$ which zsh
/opt/bin/zsh

めでたしめでたし。

Windowsでシンボリックリンクを試してみる。

きっかけは、1つのファイルを別の名前で起動したら違う動きになるようなスクリプトを書く、でした。

 busybox なんかでは、同じ実行形式ファイルの名前を、lsにすればlsと同じ、cpとすればcpと同じ動作をするようにしてますが、Pythonスクリプトでそれと同じように argv[0] を調べて、その名前によって動作を変える、ということをしたい、ということです。

まずは argtest.py というファイルを作ります。

import sys
import pathlib

f = pathlib.Path(sys.argv[0])
print(sys.argv)
print(f.name)
print(__file__)

これを実行すると、

C:\Users\kats\projects\argtest>argtest.py
['C:\\Users\\kats\\projects\\argtest\\argtest.py']
argtest.py
C:\Users\kats\projects\argtest\argtest.py

C:\Users\kats\projects\argtest>py argtest.py
['argtest.py']
argtest.py
C:\Users\kats\projects\argtest\argtest.py

C:\Users\kats\projects\argtest>python argtest.py
['argtest.py']
argtest.py

のようになります。py または python を指定して実行するとファイル名のみ、直接実行するとフルパス名が argv[0] に入っているようです。

次にショートカットを作成してみます。コマンドプロンプトから作るのは WSH を呼び出すスクリプトが必要なようなので、エクスプローラーから行います。

作成すると、 "argtest.py - ショートカット.lnk" というファイルが作成されます。サフィックスの ".lnk" は拡張子を表示する設定にしないと表示されませんが、ショートカットにつく拡張子です。余談ですが、".lnk" をリネームで削除してもショートカットとして使えるようです。

C:\Users\kats\projects\argtest>"argtest.py - ショートカット.lnk"
['C:\\Users\\kats\\projects\\argtest\\argtest.py']
argtest.py
C:\Users\kats\projects\argtest\argtest.py

C:\Users\kats\projects\argtest>py "argtest.py - ショートカット.lnk"
  File "C:\Users\kats\projects\argtest\argtest.py - ショートカット.lnk", line 1
    L
SyntaxError: source code cannot contain null bytes

C:\Users\kats\projects\argtest>python "argtest.py - ショートカット.lnk"
  File "C:\Users\kats\projects\argtest\argtest.py - ショートカット.lnk", line 1
    L
SyntaxError: source code cannot contain null bytes

実行するとショートカットをダイレクトに起動した場合以外はエラーになります。また、ダイレクトに起動した場合でも argv[0] には元ファイルのファイル名が入っているようです。これだと、呼び出しファイル名で動作を変えることができません。

ちなみに、エディタによっては、ショートカットファイルを編集すると、その元ファイルを開いてくれるものもあるようです。

ショートカットでは argv[0] に元ファイル名しか入っていないと、動作を変えることができません。UNIX系OSではシンボリックリンクを実行形式ファイルに張ると、ちゃんと argv[0] にシンボリックリンクの名前が入ってくるので、Windows上でシンボリックリンクが使えないか調べてみました。

Windowsには標準コマンドで mklink というのがあるようです。mklinkではハードリンクも作成できるようですが、同一のファイルシステム内にしか作成できないということで、ここではシンボリックリンクを試します。

ちなみにmklinkの実行は管理者権限が必要で、通常のコマンドプロンプトから実行すると怒られます。

C:\Users\kats\projects\argtest>mklink argtest2.py argtest.py
argtest2.py <<===>> argtest.py のシンボリック リンクが作成されました

シンボリックリンクを作成しました。早速実行してみると、

C:\Users\kats\projects\argtest>argtest2.py
['C:\\Users\\kats\\projects\\argtest\\argtest.py']
argtest.py
C:\Users\kats\projects\argtest\argtest.py

C:\Users\kats\projects\argtest>py argtest2.py
['argtest2.py']
argtest2.py
C:\Users\kats\projects\argtest\argtest2.py

C:\Users\kats\projects\argtest>python argtest2.py
['argtest2.py']
argtest2.py
C:\Users\kats\projects\argtest\argtest2.py

となります。今度は直接実行した場合に元ファイル名が出てきました。なかなかうまくいかないもんです。がっくし。

余談ですが、開発者モードというのを有効にしてやると、管理者モードのコマンドプロンプトでなくてもmklinkは実行できるようです。が、セキュリティ的によろしくないのでやめておきます。

ついでに、ものは試しでハードリンクもやってみます。

C:\Users\kats\projects\argtest>argtest3.py
['C:\\Users\\kats\\projects\\argtest\\argtest3.py']
argtest3.py
C:\Users\kats\projects\argtest\argtest3.py

C:\Users\kats\projects\argtest>py argtest3.py
['argtest3.py']
argtest3.py
C:\Users\kats\projects\argtest\argtest3.py

C:\Users\kats\projects\argtest>python argtest3.py
['argtest3.py']
argtest3.py
C:\Users\kats\projects\argtest\argtest3.py
これだとバッチリみたいですね。うーむ。

AstroNvimをインストールしてみる。

この2年ほどVS Codeを使っていたのだけれど、編集作業はVimのほうが馴染んでるというのもあって、ふと目にしたAstroNvimの記事に触発されて、またNeovimに戻ろうかな、などと思い立ち。

AstroNvimのGetting Startedの内容に従って進めていきます。

まず、事前に必要なもの。

  • Nerd Fonts (Optional with manual intervention: See Recipes/Customizing Icons) [1]
  • Neovim v0.8+ (Not including nightly)
  • Tree-sitter CLI (Note: This is only necessary if you want to use auto_install feature with Treesitter)
  • A clipboard tool is necessary for the integration with the system clipboard (see :help clipboard-tool for supported solutions)
  • Terminal with true color support (for the default theme, otherwise it is dependent on the theme you are using) [2]

Optional Requirements:

  • ripgrep - live grep telescope search (<leader>fw)
  • lazygit - git ui toggle terminal (<leader>tl or <leader>gg)
  • go DiskUsage() - disk usage toggle terminal (<leader>tu)
  • bottom - process viewer toggle terminal (<leader>tt)
  • Python - python repl toggle terminal (<leader>tp)
  • Node - Node is needed for a lot of the LSPs, and for the node repl toggle terminal (<leader>tn)

Neovimはリリースの一番新しい0.9.4をダウンロードして展開しました。

Nerd Fontは、すべて必要な記号フォントを含んでいるとのことで、自分好みのフォントを選択します。自分は普段はMyricaM Monoを使っているので、そのASCII文字フォントのベースとなっているInconsolataに近いNoto Nerd Fontを使ってみることにします。手間がかかりそうですが、記号部分だけを手持ちのフォントにマージして使うこともできるようですから、日本語を使う際にはそちらのほうがいいかもしれません。

Tre-sitter CLIはcargoまたはnpmでインストールできるようですが、pre-builtバイナリも提供されているようなので、そちらを使ってみます。pre-builtバイナリにはexe形式のバイナリが入っていますので、これを展開したnvim/binディレクトリに配置します。

フルカラーをサポートしたターミナルは、Windows Terminalを使えばいいかと思うのでそのままで。

クリップボードツールは、Windowsの場合にはwin32yankを使うようです。これはデフォルトでneovimのアーカイブに含まれているのでそのままで。

その他のオプションでは、ripgrepは常用しているのでOK、Pythonも常用しているのでOK、あとは追追という事にします。

次に、Installationに従って、古いNeovimの設定をバックアップしておきます。

Move-Item $env:LOCALAPPDATA\nvim $env:LOCALAPPDATA\nvim.bak

ただし、$XDG_CONFIG_HOMEが設定されていると、nvimディレクトリは $HOME/.config/nvimになります。

Move-Item $env:XDG_CONFIG_HOME\nvim $env:XDG_CONFIG_HOME\nvim.bak

nvim-dataもバックアップしておきます。

Move-Item $env:LOCALAPPDATA\nvim-data $env:LOCALAPPDATA\nvim-data.bak

最後に、AstroNvimのリポジトリをクローンします。

git clone --depth 1 https://github.com/AstroNvim/AstroNvim $env:LOCALAPPDATA\nvim

ここでも、$XDG_CONFIG_HOMEが設定されている場合には変更します。

git clone --depth 1 https://github.com/AstroNvim/AstroNvim $env:XDG_CONFIG_HOME\nvim

起動してもいいのですが、とりあえず使用したいLSPとしてpyrightを、またNeovimのPythonバインディングのpynvimをインストールします。

pip install pyright pynvim

そしてWindows TerminalのPowerShellプロンプトからnvimを起動すると、いろいろと裏で設定してくれます。

一部文字が化けているので、Windows TerminalでAstroNvim専用のプロファイルを作成し、インストールしたNerd Fontを使用するように設定を変更します。

それから、ccかgccかclangかなんかのCコンパイラが見つからない、と言われるので、Visual Studioはインストールしてあるのだけれどzigというのを入れてみました。ダウンロードしたアーカイブを展開してパスを通すだけですみます。

使い方は徐々に覚えねば。


WindowsのPython3にmysqlclientをインストールする。

単純に
$ pip install mysqlclient
ではエラーを吐いてインストールできなかったので、やったことメモ。

コンソールからpipすると、以下のような感じでエラーになってしまいます。
> pip install mysqlclient
Collecting mysqlclient
  Using cached mysqlclient-2.2.0.tar.gz (89 kB)
  Installing build dependencies ... done
  Getting requirements to build wheel ... done
  Installing backend dependencies ... done
  Preparing metadata (pyproject.toml) ... done
Building wheels for collected packages: mysqlclient
  Building wheel for mysqlclient (pyproject.toml) ... error
  error: subprocess-exited-with-error

  × Building wheel for mysqlclient (pyproject.toml) did not run successfully.
  │ exit code: 1
  ╰─> [46 lines of output]
      # Options for building extention module:
        library_dirs: ['C:/mariadb-connector\\lib\\mariadb', 'C:/mariadb-connector\\lib']
        libraries: ['kernel32', 'advapi32', 'wsock32', 'shlwapi', 'Ws2_32', 'crypt32', 'secur32', 'bcrypt', 'mariadbclient']
        extra_link_args: ['/MANIFEST']
        include_dirs: ['C:/mariadb-connector\\include\\mariadb', 'C:/mariadb-connector\\include']
        extra_objects: []
        define_macros: [('version_info', (2, 2, 0, 'final', 0)), ('__version__', '2.2.0')]
      running bdist_wheel
      running build
      running build_py
      creating build
      creating build\lib.win-amd64-cpython-312
      creating build\lib.win-amd64-cpython-312\MySQLdb
      copying src\MySQLdb\connections.py -> build\lib.win-amd64-cpython-312\MySQLdb
      copying src\MySQLdb\converters.py -> build\lib.win-amd64-cpython-312\MySQLdb
      copying src\MySQLdb\cursors.py -> build\lib.win-amd64-cpython-312\MySQLdb
copying src\MySQLdb\release.py -> build\lib.win-amd64-cpython-312\MySQLdb copying src\MySQLdb\times.py -> build\lib.win-amd64-cpython-312\MySQLdb copying src\MySQLdb\_exceptions.py -> build\lib.win-amd64-cpython-312\MySQLdb copying src\MySQLdb\__init__.py -> build\lib.win-amd64-cpython-312\MySQLdb creating build\lib.win-amd64-cpython-312\MySQLdb\constants copying src\MySQLdb\constants\CLIENT.py -> build\lib.win-amd64-cpython-312\MySQLdb\constants copying src\MySQLdb\constants\CR.py -> build\lib.win-amd64-cpython-312\MySQLdb\constants copying src\MySQLdb\constants\ER.py -> build\lib.win-amd64-cpython-312\MySQLdb\constants copying src\MySQLdb\constants\FIELD_TYPE.py -> build\lib.win-amd64-cpython-312\MySQLdb\constants copying src\MySQLdb\constants\FLAG.py -> build\lib.win-amd64-cpython-312\MySQLdb\constants copying src\MySQLdb\constants\__init__.py -> build\lib.win-amd64-cpython-312\MySQLdb\constants running egg_info writing src\mysqlclient.egg-info\PKG-INFO writing dependency_links to src\mysqlclient.egg-info\dependency_links.txt writing top-level names to src\mysqlclient.egg-info\top_level.txt reading manifest file 'src\mysqlclient.egg-info\SOURCES.txt' reading manifest template 'MANIFEST.in' adding license file 'LICENSE' writing manifest file 'src\mysqlclient.egg-info\SOURCES.txt' copying src\MySQLdb\_mysql.c -> build\lib.win-amd64-cpython-312\MySQLdb running build_ext building 'MySQLdb._mysql' extension creating build\temp.win-amd64-cpython-312 creating build\temp.win-amd64-cpython-312\Release creating build\temp.win-amd64-cpython-312\Release\src creating build\temp.win-amd64-cpython-312\Release\src\MySQLdb "C:\Program Files\Microsoft Visual Studio\2022\Community\VC\Tools\MSVC\14.37.32822\bin\HostX86\x64\cl.exe" /c /nologo /O2 /W3 /GL /DNDEBUG /MD "-Dversion_info=(2, 2, 0, 'final', 0)" -D__version__=2.2.0 -IC:/mariadb-connector\include\mariadb -IC:/mariadb-connector\include -IC:\Apps\Python312\include -IC:\Apps\Python312\Include "-IC:\Program Files\Microsoft Visual Studio\2022\Community\VC\Tools\MSVC\14.37.32822\include" "-IC:\Program Files\Microsoft Visual Studio\2022\Community\VC\Tools\MSVC\14.37.32822\ATLMFC\include" "-IC:\Program Files\Microsoft Visual Studio\2022\Community\VC\Auxiliary\VS\include" "-IC:\Program Files (x86)\Windows Kits\10\include\10.0.22621.0\ucrt" "-IC:\Program Files (x86)\Windows Kits\10\\include\10.0.22621.0\\um" "-IC:\Program Files (x86)\Windows Kits\10\\include\10.0.22621.0\\shared" "-IC:\Program Files (x86)\Windows Kits\10\\include\10.0.22621.0\\winrt" "-IC:\Program Files (x86)\Windows Kits\10\\include\10.0.22621.0\\cppwinrt" "-IC:\Program Files (x86)\Windows Kits\NETFXSDK\4.8\include\um" /Tcsrc/MySQLdb/_mysql.c /Fobuild\temp.win-amd64-cpython-312\Release\src/MySQLdb/_mysql.obj _mysql.c src/MySQLdb/_mysql.c(29): fatal error C1083: include ファイルを開けません。'mysql.h':No such file or directory error: command 'C:\\Program Files\\Microsoft Visual Studio\\2022\\Community\\VC\\Tools\\MSVC\\14.37.32822\\bin\\HostX86\\x64\\cl.exe' failed with exit code 2 [end of output] note: This error originates from a subprocess, and is likely not a problem with pip. ERROR: Failed building wheel for mysqlclient Failed to build mysqlclient ERROR: Could not build wheels for mysqlclient, which is required to install pyproject.toml-based projects
PyPIのmysqlclientのページには、wheelがどっかにあるのでそれ使ってね、でももし使ってるバージョンのPython用のバイナリがなければ、自分でビルドしてね、と書いてあります。
To build from source, download the MariaDB C Connector and install it. It must be installed in the default location (usually "C:\Program Files\MariaDB\MariaDB Connector C" or "C:\Program Files (x86)\MariaDB\MariaDB Connector C" for 32-bit).
なので、上記のリンクから MariaDB Connector/C の Windows 64bit 用をダウンロードしてインストールします。
ところが、上記のエラーメッセージを見ると、ヘッダファイルとライブラリを探しにくのは 'C:/mariadb-connector' となっているので、デフォルトの 'C:/Program Files/mariadb-connector/MariaDB/MariaDB Connector C 64-bit'へは探しに行ってくれません。
別の場所にインストールしたら環境変数 MYSQLCLIENT_CONNECTOR を設定しろと書いてありますが、それもめんどくさいので、指定されている 'C:/mariadb-connector' に中身をまるごとコピーしてから pip します。

> pip install mysqlclient
Collecting mysqlclient
  Using cached mysqlclient-2.2.0.tar.gz (89 kB)
  Installing build dependencies ... done
  Getting requirements to build wheel ... done
  Installing backend dependencies ... done
  Preparing metadata (pyproject.toml) ... done
Building wheels for collected packages: mysqlclient
  Building wheel for mysqlclient (pyproject.toml) ... done
  Created wheel for mysqlclient: filename=mysqlclient-2.2.0-cp312-cp312-win_amd64.whl size=193628 sha256=1f5f38e2b183905d5b39f7edf7542c7b530123c3031016a460379cbc50d45de1
  Stored in directory: c:\users\kats\appdata\local\pip\cache\wheels\03\31\a0\f0056b8be9d1dc4eb1287b268b5d5dbbe0b206362d8aa35967
Successfully built mysqlclient
Installing collected packages: mysqlclient
Successfully installed mysqlclient-2.2.0
ということでインストールできました。…などと書いている途中で、MariaDBなどというパッケージを見つけてしまいました。

どっちがいいんでしょうか…。

ついでにもうちょっと探したら、PyMySQLというのも見つけました。どうやら皆さん、こちらを使っている模様。

やっぱりZOOT Nativeはやめた。

NVR510に切り替えてみた。で、Yamaha NVR510を導入したエントリを書きました。
その後、それまで契約していた ZOOT NEXT を解約して ZOOT Native に切り替える…つもりだったのですが。実は11月で ZOOT Native は解約しました。

切り替えるにはconfigをいちいちいじらないといけないのですが、ちゃんとテストしないとと思い、テストしてみました。
以下は現在の状況ですが、ダウンストリームで700Mbps、アップストリームで340Mbpsと、非常に高速です。一般的には PPPoE は IPoE よりも遅い、と言われているようなのですが、うちの場合にはどちらもまったく同じ程度の速度でした。
ただし、これは NVR510 に切り替えてからのことで、それまで使っていた ATermではここまでの速度は出ませんでした。だいたいこの5分の1程度でしょうか。
ともあれ、PPPoE でも IPoE でも速度はほとんど変わらないことがわかりました。

ではなぜ NEXT から Native にしなかったかというと、固定IPの DNS 登録が絡んでいます。

うちでは Gonbei で独自にドメインを取得しています。これまで、そのドメインでサーバを運用していました。ところが Native にすると IPアドレス自体は外部からもアクセスできるのですが、ドメイン名が引けません。なにやら技術上の問題があるようで、InterlinkのFAQにもあまり詳しく書いてませんが Native で固定IPサービスを利用しても、Gonbei への登録ができないようです。

ということで、NEXTに戻ったのでした。


SQLite3で正規表現してみる。

プライベートで作っているDB、別にMySQLでもMariaDBでもなんでもいいんですが、簡単なのでSQLite3を使うことにしました。
用途はビデオのタイトルと説明のリストです。録画したものがどこにあるか、的な。

ところが、登録されてるのに引っかかってこないものがあることに気づきました。まあずばり言ってしまうと "DUNE" なんですが。いわゆる全角アルファベットで、しかも文字エンコーディングは UTF-8 です。そして要望としては、"dune" でも "DUNE" でも "DUNE" でも "デューン" でも見つかってほしいな、と。

そうなると、プログラマ的には「正規表現で探せばいいじゃん」と思いつきます。関係ないですが「じゃん」を使うのは東京近郊らしいですね。関係ないですけど。

ところで、ふつうにSQL文だと LIKE を使いますが、最近は REGEXP 演算子なるものもあるようです。が、SQLite3 で
SELECT * FROM vedeo_list WHERE title REGEXP "DUNE|DUNE|dune|デューン";
などとやると、
no such function: regexp
と言われます。

SQLiteのドキュメントを見ると、
The REGEXP operator is a special syntax for the regexp() user function. No regexp() user function is defined by default and so use of the REGEXP operator will normally result in an error message. If an application-defined SQL function named "regexp" is added at run-time, then the "X REGEXP Y" operator will be implemented as a call to "regexp(Y,X)".

とあります。 Google翻訳さんにお願いすると、

REGEXP 演算子は、regexp() ユーザー関数の特別な構文です。 デフォルトでは regexp() ユーザー関数は定義されていないため、REGEXP 演算子を使用すると、通常はエラー メッセージが表示されます。 「regexp」というアプリケーション定義の SQL 関数が実行時に追加されると、「X REGEXP Y」演算子が「regexp(Y,X)」の呼び出しとして実装されます。

と訳してくれました。どうやらユーザ関数を定義しないとだめっぽいです。 一応 ext/misc/regexp.c というファイルはソースツリーにあるので、DLLかなんかの形であるのかな?とPythonのディレクトリを見てみると、DLLsディレクトリに sqlite3.dll と regexp.dll がありました。これを dumpbin してみると、

>dumpbin /exports regexp.dll
Microsoft (R) COFF/PE Dumper Version 14.34.31937.0
Copyright (C) Microsoft Corporation.  All rights reserved.


Dump of file C:\Apps\Python311\DLLs\regexp.dll

File Type: DLL

  Section contains the following exports for regexp.dll

    00000000 characteristics
    FFFFFFFF time date stamp
        0.00 version
           1 ordinal base
           1 number of functions
           1 number of names

    ordinal hint RVA      name

          1    0 00003160 sqlite3_regexp_init

  Summary

        2000 .data
        2000 .pdata
        A000 .rdata
        1000 .reloc
       10000 .text
        1000 _RDATA
となっているので、このDLLを読み込んでやればきっといいんでしょうね。
検索してみたら、Run-Time Loadable Extensions というページになにか書いてありました。が、いろいろ書いてあるんですが、じゃあどうすればいいの?がよくわかりません。

An SQLite extension is a shared library or DLL. To load it, you need to supply SQLite with the name of the file containing the shared library or DLL and an entry point to initialize the extension. In C code, this information is supplied using the sqlite3_load_extension() API. See the documentation on that routine for additional information.

Note that different operating systems use different filename suffixes for their shared libraries. Windows uses ".dll", Mac uses ".dylib", and most unixes other than mac use ".so". If you want to make your code portable, you can omit the suffix from the shared library filename and the appropriate suffix will be added automatically by the sqlite3_load_extension() interface.

There is also an SQL function that can be used to load extensions: load_extension(X,Y). It works just like the sqlite3_load_extension() C interface.

Both methods for loading an extension allow you to specify the name of an entry point for the extension. You can leave this argument blank - passing in a NULL pointer for the sqlite3_load_extension() C-language interface or omitting the second argument for the load_extension() SQL interface - and the extension loader logic will attempt to figure out the entry point on its own. It will first try the generic extension name "sqlite3_extension_init". If that does not work, it constructs a entry point using the template "sqlite3_X_init" where the X is replaced by the lowercase equivalent of every ASCII character in the filename after the last "/" and before the first following "." omitting the first three characters if they happen to be "lib". So, for example, if the filename is "/usr/lib/libmathfunc-4.8.so" the entry point name would be "sqlite3_mathfunc_init". Or if the filename is "./SpellFixExt.dll" then the entry point would be called "sqlite3_spellfixext_init".
For security reasons, extension loading is turned off by default. In order to use either the C-language or SQL extension loading functions, one must first enable extension loading using the sqlite3_db_config(db,SQLITE_DBCONFIG_ENABLE_LOAD_EXTENSION,1,NULL) C-language API in your application.
C言語から使うときには、sqlite3_load_extension() APIを使うといいよ、あとSQL関数の load_extension(X, Y) もあるよ、Xにはダイナミックライブラリ(WindowsではDLL)を指定すればいいよ、そうすればエントリポイントは勝手に実行されるよ、みたいなことが書いてあります。また、セキュリティ上の理由から拡張ローディングはデフォルトでは無効になってるので、sqlite3_db_config() でEnableしてやらないとだめだよ、とあります。
そのちょっとしたに、CLIではデフォルトでenableになってるよ、ともあります。残念ながらあまりいいドキュメントじゃないかも…。

ということなので、やってみました。
> sqlite3
SQLite version 3.40.0 2022-11-16 12:10:08
Enter ".help" for usage hints.
Connected to a transient in-memory database.
Use ".open FILENAME" to reopen on a persistent database.
sqlite> .dbconfig
          defensive off
            dqs_ddl on
            dqs_dml on
        enable_fkey off
        enable_qpsg off
     enable_trigger on
        enable_view on
     fts3_tokenizer off
 legacy_alter_table off
 legacy_file_format off
     load_extension on
   no_ckpt_on_close off
     reset_database off
        trigger_eqp off
     trusted_schema on
    writable_schema off
sqlite>
下から6番目に "load_extension on" とあります。有効化はされているようです。ところが、CLI から load_extension("regexp.dll") とかやってもエラーになるばかり。
うーん、うーん。

ここで Python のSQLite3 のドキュメントを見てみました。そしたらなんと、enable_load_extension(enabled, /)にありました。そこの注意書きには、sqlite3モジュールはデフォルトではローダブルエクステンションをサポートしてません、と書いてありますが…でもなぜか DLLs には regexp.dll があります
regexp.dllをどこからか持ってこないといけないので、Pythonに付属のSQLite 3.39.4のソースを拾ってきてVisual Studioでコンパイルしてみました。
コンパイルオプションはいろいろあるのですが、regexpはext/misc/regexpにあります。
何はともあれ試してみました。

> python
Python 3.11.1 (tags/v3.11.1:a7a450f, Dec  6 2022, 19:58:39) [MSC v.1934 64 bit (AMD64)] on win32
Type "help", "copyright", "credits" or "license" for more information.
>>> import sqlite3
>>> con=sqlite3.connect("videolist.db")
>>> cur=con.cursor()
>>> con.enable_load_extension(True)
>>> con.load_extension("c:/Apps/python311/DLLs/regexp.dll")
>>> cur.execute("SELECT * FROM videolist WHERE title REGEXP 'DUNE|DUNE'")
<sqlite3.Cursor object at 0x000001C72971A140>
>>> row = cur.fetchall()
え、なんかできてるし。 つまり、Python からならこれだけで SQLite3 の正規表現は使える、ということですね。 ついでに、さっき見たソースコードに正規表現ルールが書いてあったので引用しておきます。
The following regular expression syntax is supported:

    X*      zero or more occurrences of X
    X+      one or more occurrences of X
    X?      zero or one occurrences of X
    X{p,q}  between p and q occurrences of X
    (X)     match X
    X|Y     X or Y
    ^X      X occurring at the beginning of the string
    X$      X occurring at the end of the string
    .       Match any single character
    \c      Character c where c is one of \{}()[]|*+?.
    \c      C-language escapes for c in afnrtv.  ex: \t or \n
    \uXXXX  Where XXXX is exactly 4 hex digits, unicode value XXXX
    \xXX    Where XX is exactly 2 hex digits, unicode value XX
    [abc]   Any single character from the set abc
    [^abc]  Any single character not in the set abc
    [a-z]   Any single character in the range a-z
    [^a-z]  Any single character not in the range a-z
    \b      Word boundary
    \w      Word character.  [A-Za-z0-9_]
    \W      Non-word character
    \d      Digit
    \D      Non-digit
    \s      Whitespace character
    \S      Non-whitespace character

A nondeterministic finite automaton (NFA) is used for matching, so the
performance is bounded by O(N*M) where N is the size of the regular
expression and M is the size of the input string.  The matcher never
exhibits exponential behavior.  Note that the X{p,q} operator expands
to p copies of X following by q-p copies of X? and that the size of the
regular expression in the O(N*M) performance bound is computed after
this expansion.
非決定論的有限オートマトンなのでパフォーマンスは O(N*M) に制限される、とのことですが、とにかく動くことが大事なので見なかったことにします。 Python の re モジュールとはちょっと違うようですし、PCRE とも違いますが、ここまでわかればなんとかなりそうです。 実際のコードは、
import sqlite3
from sys import exec_prefix

    conn = sqlite3.connect(db_file)
    conn.enable_load_extension(True)
    conn.load_extension(exec_prefix + "/DLLs/regexp.dll")
    conn.row_factory = sqlite3.Row
    cur = conn.cursor()
みたいに使えばいいでしょう。

SWDなら3線でいいとはいうものの。

 安価で優秀なデバッグプローブはないかしら、と探したら、 Raspberry Pi Debug Probe というのがあったんですが、これは3線がにゅるんと出てるだけです。 もちろんSWDなら3線を繋げばいいのではありますが、汎用的に考えるなら5x2のリボンケーブルコネクタが欲し...